How to label data for RF-DETR Pose training
Before you can train a computer vision model, you need labeled data on which to train your model. The more accurate the labels, or annotations, are, the higher the performance the model will achieve.
Overview
RF-DETR Pose finds each object and the position of its keypoints, like the joints of a person or the hooves of a horse. So labeling for RF-DETR Pose means drawing a box around each object and placing its points. This guide shows how to do that with Roboflow Annotate, then train RF-DETR Pose in Roboflow or export your labels to train it yourself.
Roboflow Annotate runs in your browser and is free to start. Roboflow is SOC 2 Type 2 compliant and used by over 2 million developers.
To label data for RF-DETR Pose, you will:
- Create a keypoint detection project and upload images
- Set up a skeleton for each class
- Place keypoints on each object
- Label faster with AI
- Train RF-DETR Pose or export your data
Step 1: Create a project and upload images
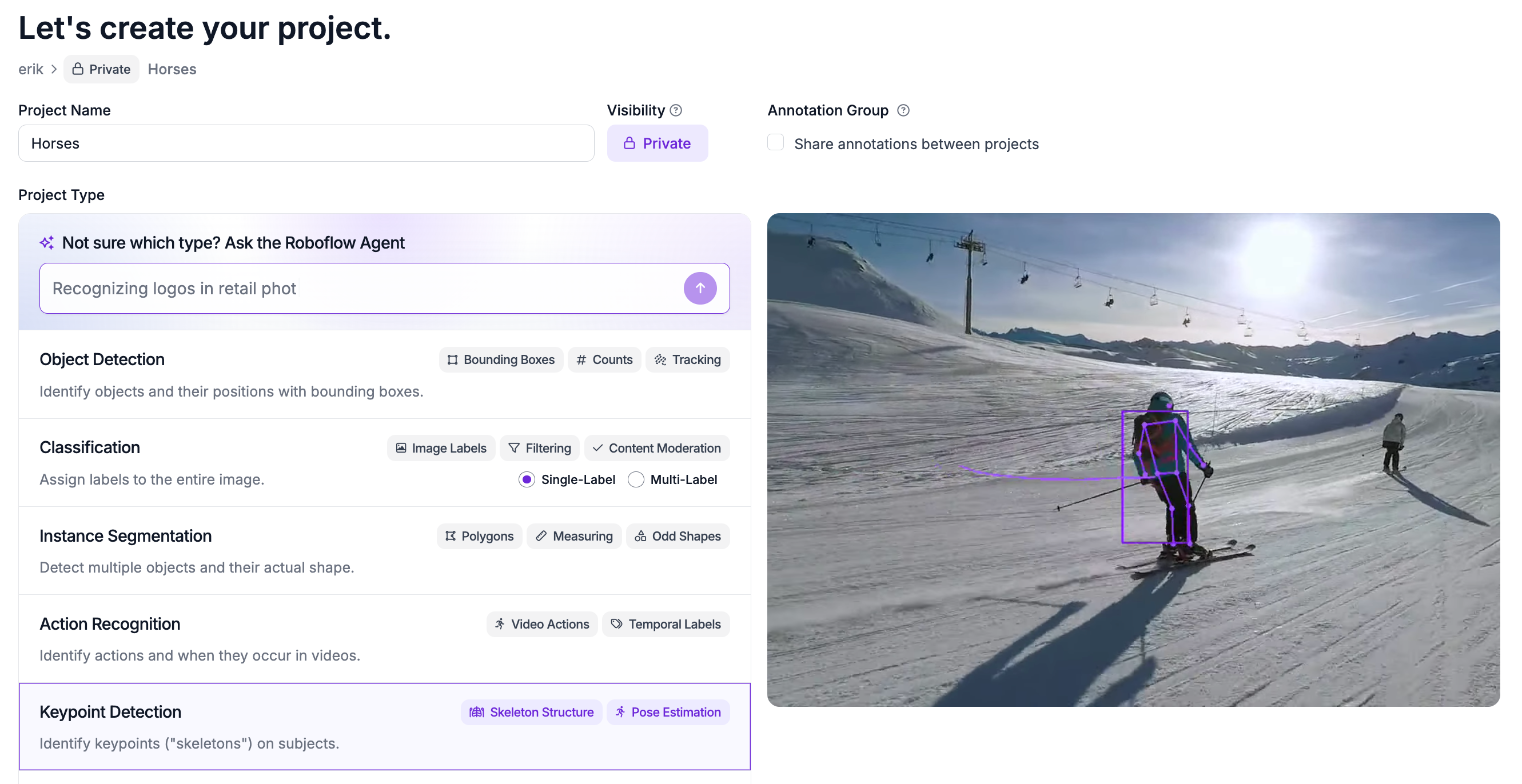
Create a free Roboflow account, then create a new project. Give it a name and choose Keypoint Detection as the project type:
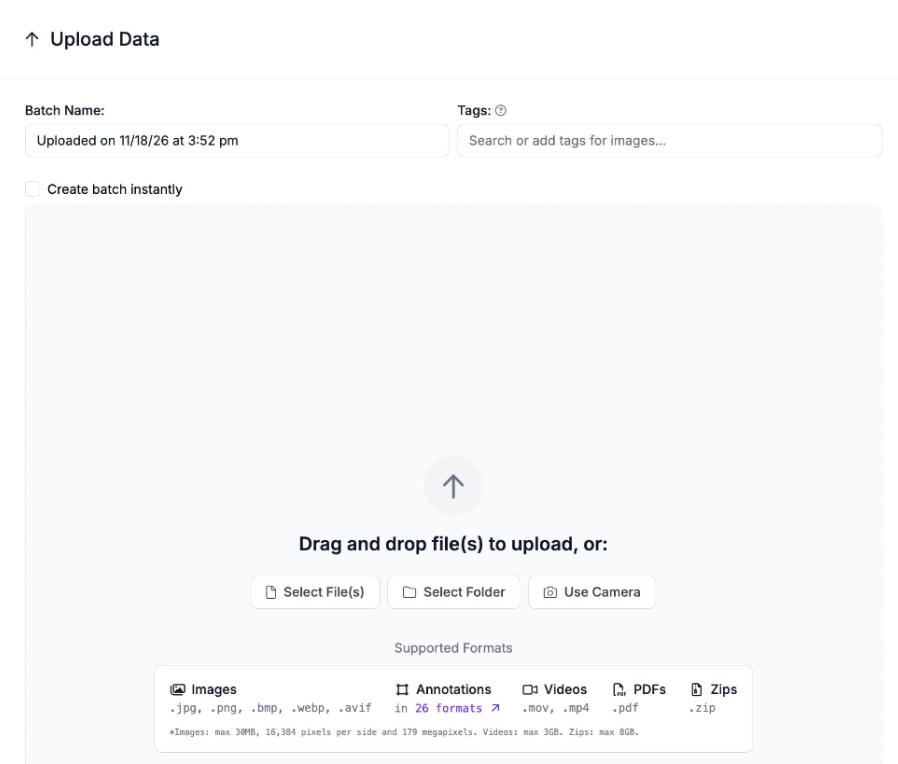
Next, upload your images. Drag them onto the Upload Data page, or select files or a whole folder. If you already have labels, upload the annotation files with your images to review or fix them in Roboflow Annotate:
Step 2: Set up a skeleton for each class
A skeleton defines the points to find on an object: how many there are, their names, and the edges that connect them. Every object of a class gets the same skeleton. Open Classes & Tags in your project, add a class, and click "Edit Keypoints". Click the canvas to add and name each point, select a point to connect it to another, then save:
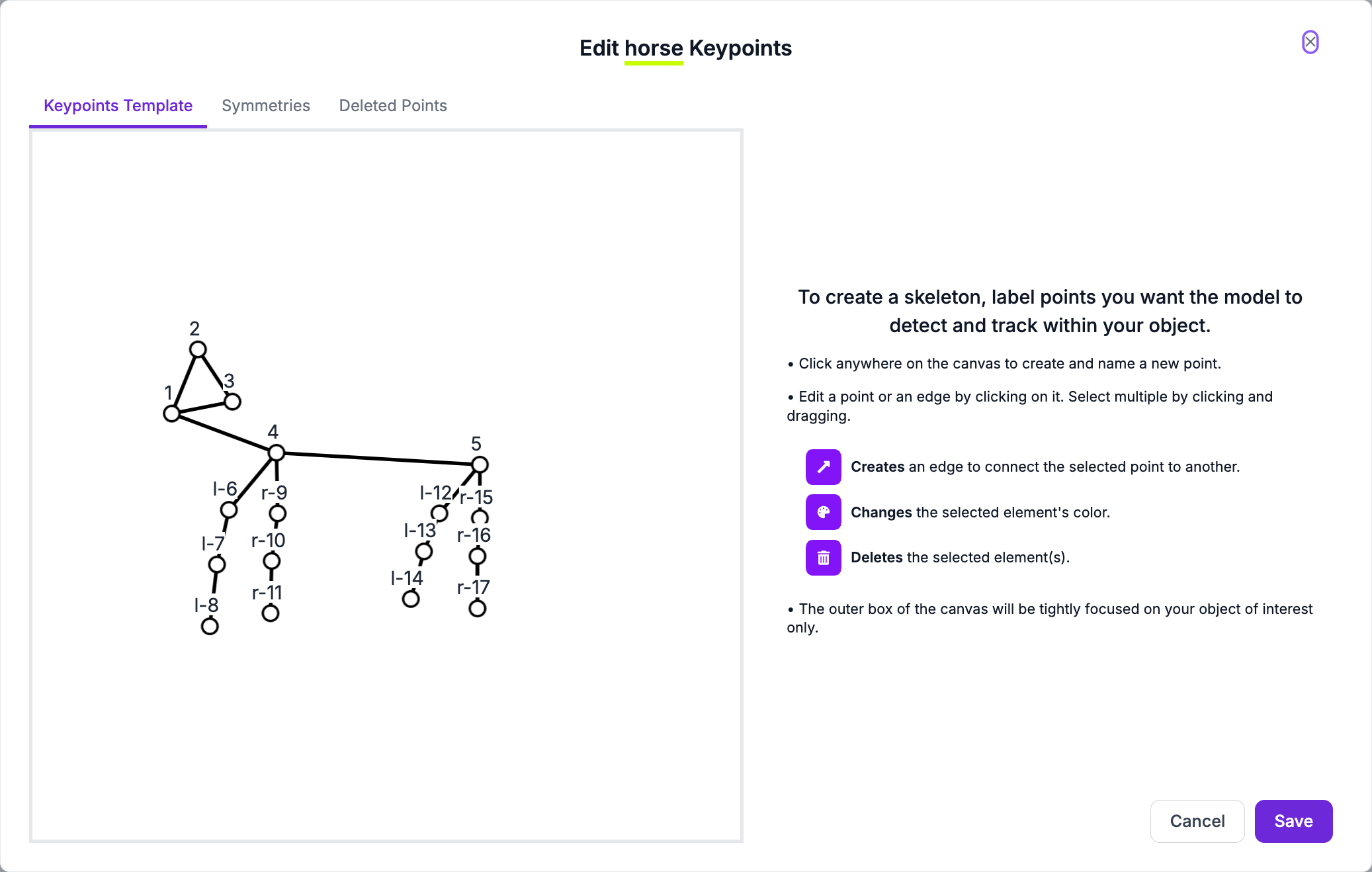
Give each point a name you will recognize later, like left front hoof, and settle the skeleton before you label many images, since every labeled object follows it.
Step 3: Place keypoints on each object
Open an image in Roboflow Annotate, select the bounding box tool, or press B, and drag a box around the object. The skeleton appears inside the box. Pick the class, then drag each point to its place on the object:
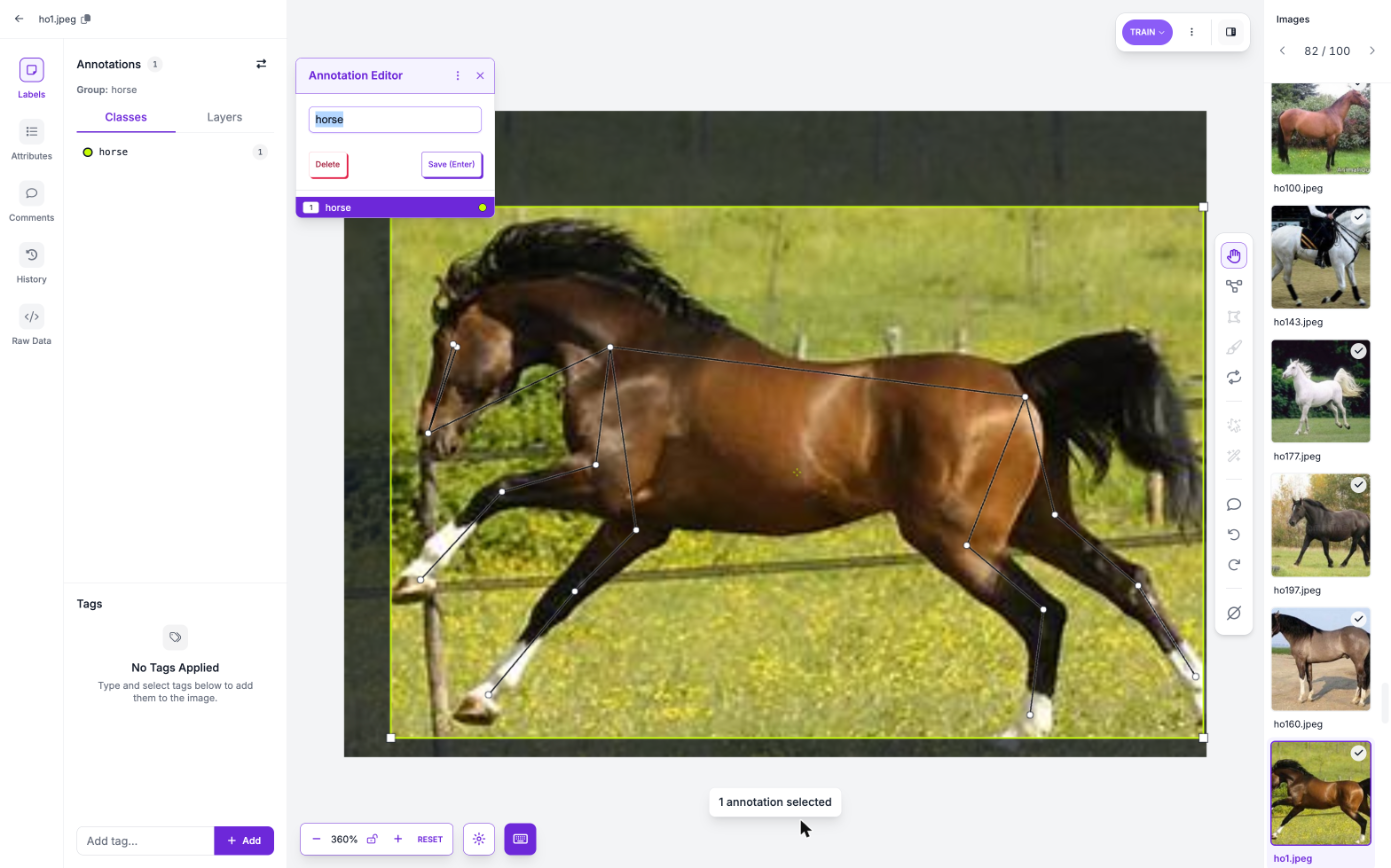
Right-click a point to set its visibility. Visible is the default. Occluded is for a point that is in the image but hidden behind something, like a leg behind the other legs, and shows as an X. Deleted is for a point that is not in the image at all. Marking hidden points this way, instead of guessing where they are, keeps your labels accurate.
Step 4: Label faster with AI
Once you have trained a first keypoint model in Roboflow, Auto Label can use it to label the rest of your images. It places the keypoints it finds and saves the ones it is less sure of as not visible, so you review them before you train again. The Auto Label documentation (opens in a new tab) covers the settings.
Step 5: Train RF-DETR Pose or export your data
When your images are labeled, generate a dataset version. Then open Train in your project, click "Custom Training", and choose "Roboflow RF-DETR Pose", which finds each object first and then predicts its keypoints. The Train a Model guide (opens in a new tab) walks through each option.
To train RF-DETR Pose on your own hardware instead, export the version as COCO JSON, which carries the keypoints with each box.